Hide your speakers, not your sound.
Architectural Speakers
Key Technologies
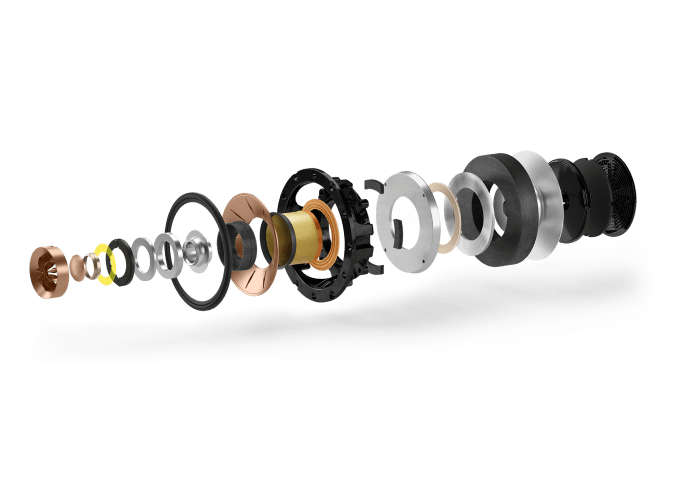
Uni-Q®
Sit anywhere, hear every detail
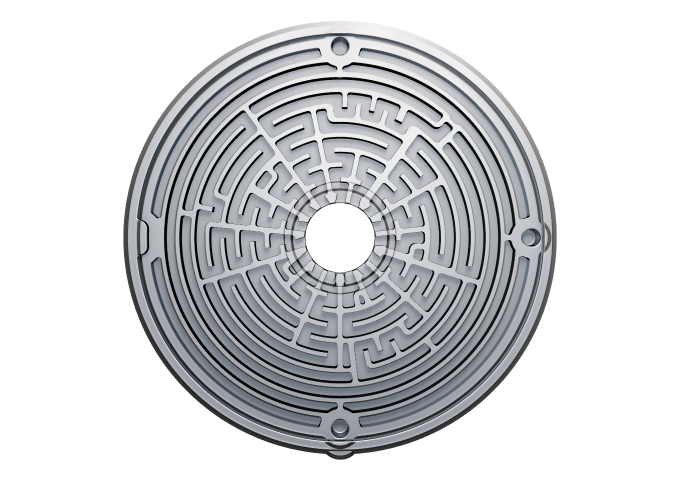
Metamaterial Absorption Technology
Absorbs 99% of unwanted sound
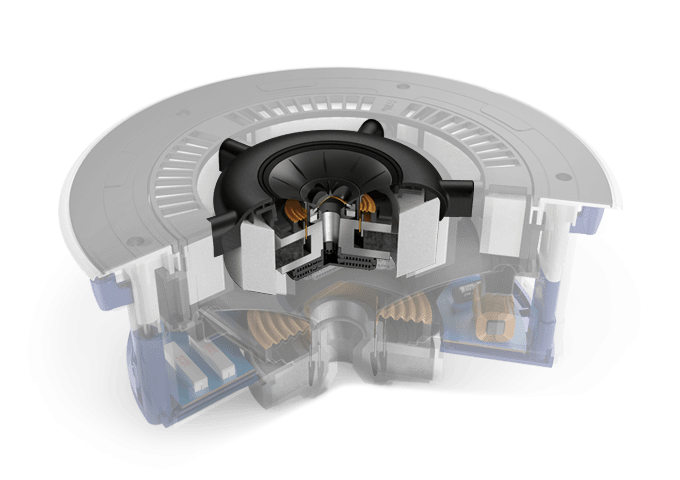
Cavity Radiation Control (CRC)
Eliminates midrange distortion
THX® Certification
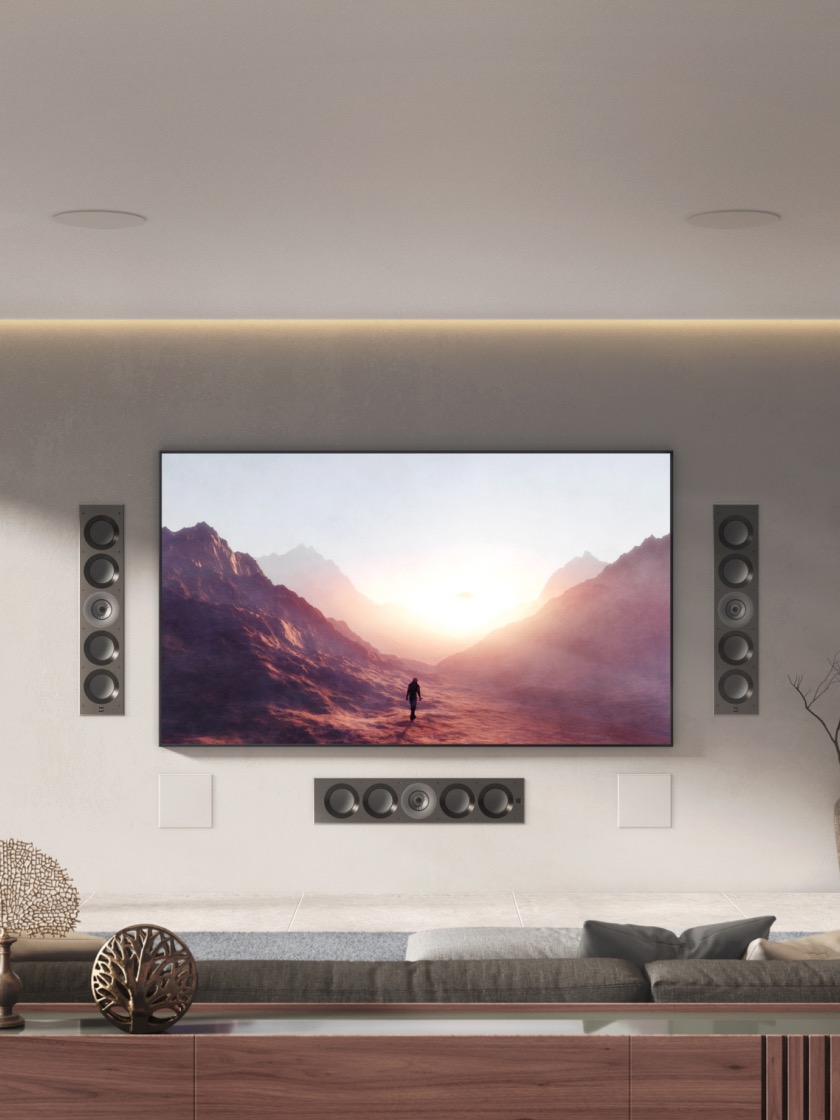
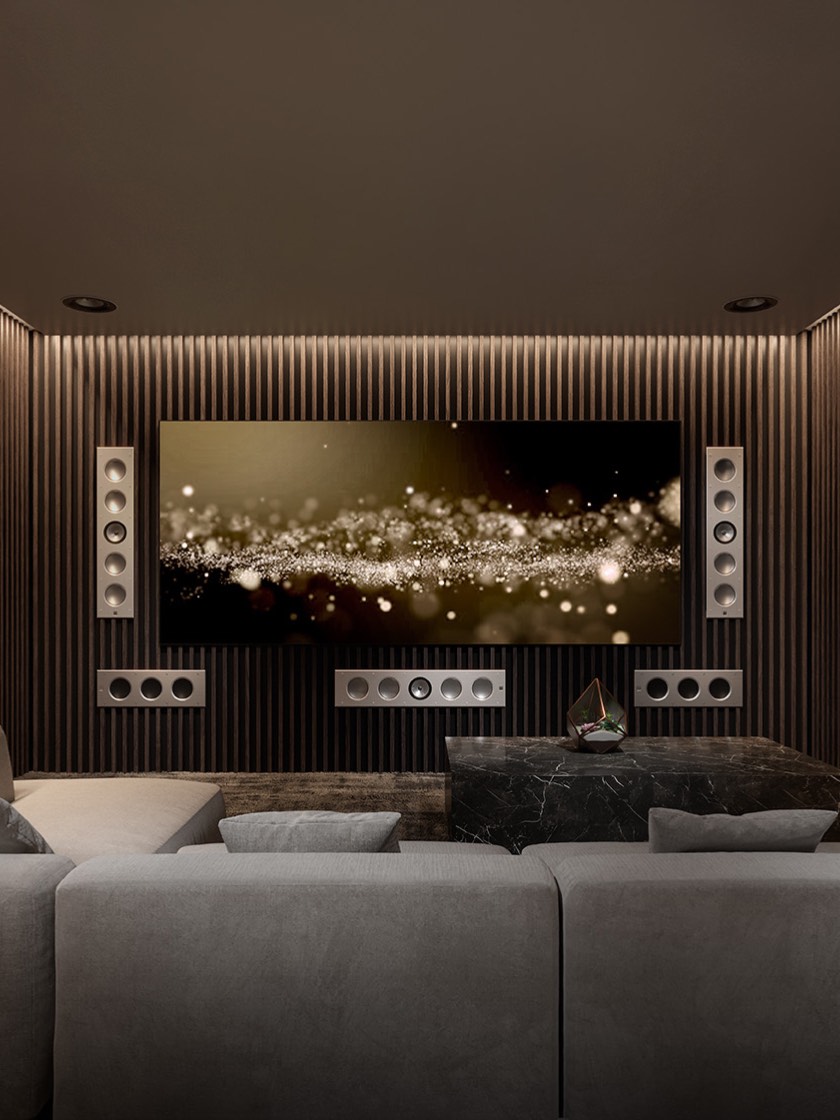
THX® Certified in the performance class of Dominus and Ultra, the formidable KEF Extreme Home Theatre system has the jaw-dropping acoustic capabilities of KEF’s award-winning speakers, with all the drama and emotional intensity of true theatre sound quality.
Ultra Thin Bezel
Designed to sit tight to the wall or ceiling with no visible gap, KEF architectural speakers disappear for an incredibly discreet installation.
Extremely Low Profile
KEF’s incredible Ci-T Series is designed for delivering the highest quality sound when mounting depth is at an absolute premium. Even with a mounting depth of only 36mm, the Ci-T Series speakers still deliver exceptional KEF sound quality.
Flush Mount
KEF’s Flush Mount range blends premium sound with premium aesthetics. Sitting completely level with the wall or ceiling with no bezel makes these loudspeakers both easy to install and satisfyingly frameless when in place. In fact, the only hint that a KEF speaker is present is the natural, room-filling sound.
Dual Stereo
For areas with space for only one speaker, KEF’s Dual Stereo model plays left and right channels from a single unit containing twin tweeters and a dual voice coil woofer.
Soundlight
As discreet as LED downlights, KEF’s tiny Soundlight gives you big speaker performance with outstanding sound coverage, thanks to Uni-Q’s exceptionally wide dispersion.
Weatherproof
On the patio, by the pool, or on a yacht, the KEF Ventura Series outdoor speakers let customers enjoy music without compromise. Engineered to IP65 standards, these rugged, hard-wearing speakers can withstand even the most extreme weather conditions.
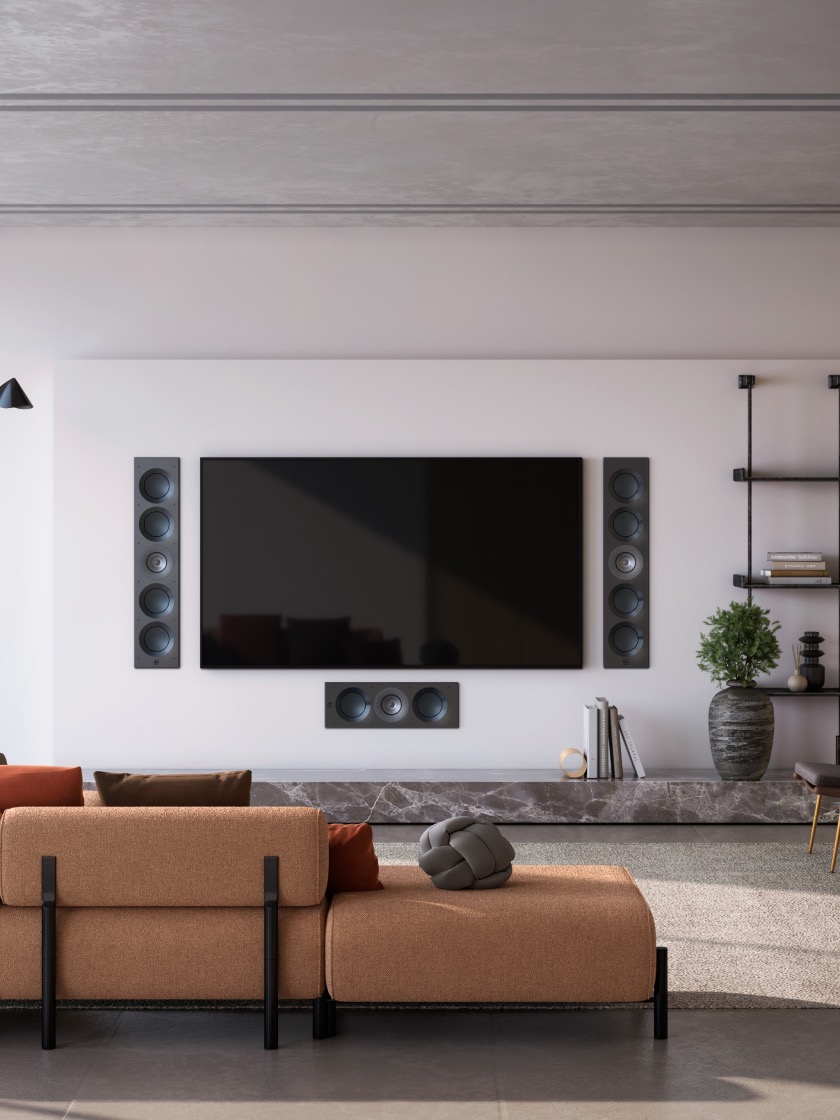
Extreme Home Theatre
In-Wall
In-Ceiling

Special Applications

Installed Subwoofers

Outdoor
Accessories
Extreme Home Theatre
In-Wall
In-Ceiling
Special Applications
Installed Subwoofers
Outdoor
Accessories
What are Ci or architectural speakers?

How do you install in-wall or ceiling speakers?
1. Choose the Location:
Choose the best locations for your speakers, considering sound distribution and room layout.
2. Use the Cutout Template:
Most in-wall and in-ceiling speakers come with a cutout template. Use this template to mark the area on the wall or ceiling where you'll cut.
3. Cut the Opening:
Carefully cut along the marked lines to create the opening for the speaker, ensuring clean edges for a professional finish.
4. Run the Wiring:
Run speaker wire from your audio source to the cutout location, ensuring it is secured and hidden as much as possible.
5. Install the Speaker:
Connect the speaker to the wiring and secure it in place according to the manufacturer's instructions.
6. Finish Up:
Once installed, you can paint or finish the wall or ceiling around the speaker for a seamless look.
If you’re unsure about any part of the installation, it's best to consult a professional. Hiring a trusted expert can ensure your speakers are installed correctly and maximise your sound experience.
For a list of reliable professionals, check out our Store Locator to find partners in your area.
What do the numbers and letters in architectural speaker names mean?
Example 1: Ci250RRM-THX
Ci: Custom Installation
250: 250mm woofer size
R: R Series
R: Round shape
M: Metamaterial Absorption Technology
THX: THX Certified
Example 2: Ci3160RLb-THX
Ci: Custom Installation
3 x 160: Three 160mm woofers
R: R Series
L: Rectangle shape
b: Subwoofer
THX: THX Certified
For more details, please refer to the Selection and Setup Guide.
What are Ci or architectural speakers?
Ci (Custom Installation) or architectural speakers are designed to be integrated into a building's structure, providing high-quality audio without the visual bulk of traditional speakers. These speakers are typically installed in walls or ceilings, allowing them to blend seamlessly into the environment.
How do you install in-wall or ceiling speakers?
Installing in-wall or ceiling speakers can be a rewarding project if you're handy. Here are the top-line steps to guide you through the process:
1. Choose the Location:
Choose the best locations for your speakers, considering sound distribution and room layout.
2. Use the Cutout Template:
Most in-wall and in-ceiling speakers come with a cutout template. Use this template to mark the area on the wall or ceiling where you'll cut.
3. Cut the Opening:
Carefully cut along the marked lines to create the opening for the speaker, ensuring clean edges for a professional finish.
4. Run the Wiring:
Run speaker wire from your audio source to the cutout location, ensuring it is secured and hidden as much as possible.
5. Install the Speaker:
Connect the speaker to the wiring and secure it in place according to the manufacturer's instructions.
6. Finish Up:
Once installed, you can paint or finish the wall or ceiling around the speaker for a seamless look.
If you’re unsure about any part of the installation, it's best to consult a professional. Hiring a trusted expert can ensure your speakers are installed correctly and maximise your sound experience.
For a list of reliable professionals, check out our Store Locator to find partners in your area.
What do the numbers and letters in architectural speaker names mean?
The nomenclature of our architectural speakers specifies key features, including woofer size, range name, shape, and special applications. Here are two examples:
Example 1: Ci250RRM-THX
Ci: Custom Installation
250: 250mm woofer size
R: R Series
R: Round shape
M: Metamaterial Absorption Technology
THX: THX Certified
Example 2: Ci3160RLb-THX
Ci: Custom Installation
3 x 160: Three 160mm woofers
R: R Series
L: Rectangle shape
b: Subwoofer
THX: THX Certified
For more details, please refer to the Selection and Setup Guide.


